What is a Subform?
A subform functions as a supplementary form or table, allowing the addition of multiple entries to a primary form.
For example, if you’re looking at a customer’s profile in a CRM, the subform might show details of their orders or interactions. They make sure that all the data related to a customer stays connected and easy to find. So, when you’re looking at a customer’s main profile, you can quickly see all their related info without searching around.
Subforms also make it easier for users to understand complex data. Instead of sorting through lots of different screens, everything is neatly organized in one place. Plus, they help with data entry. You can add related information right where it belongs, without having to jump between different forms or screens.
And the best part is, CRM systems usually let you customize subforms. You can decide what information shows up and how it’s arranged, giving you more control over how you work with your data.
The subform feature offers several benefits for businesses:
Enhanced Data Organization
The subform feature helps businesses keep their data organized by allowing them to group related information within a main record. For example, if you’re managing customer profiles, the subform could display details like purchase history or service inquiries neatly within each customer’s profile.
Improved Data Accessibility
With subforms, accessing related data becomes a breeze. Instead of hunting through different records or systems, everything you need is right there within the main record. This makes it quicker and easier for employees to find the information they need to do their jobs effectively.
Streamlined Workflows
Subforms streamline your work processes by letting you input and access related data without having to switch between different screens or records. This not only saves time but also reduces the chances of errors that can occur when manually transferring information between different places.
Better Decision-Making
When all the relevant data is right there in front of you, making informed decisions becomes much simpler. Whether you’re analyzing customer trends or project milestones, having comprehensive information at your fingertips empowers you to make better choices for your business.
Customization and Flexibility
One of the great things about subforms is that they can be tailored to fit your business needs. CRM systems often offer customization options, allowing you to decide what information is displayed and how it’s arranged. This means you can adapt the subform feature to match your unique workflows and processes.
Improved User Experience
Subforms enhance the user experience by presenting related data in a clear and organized manner. This makes it easier for your team to navigate the CRM system and find the information they need quickly and efficiently.
Increased Efficiency
By streamlining workflows and improving data access, subforms help your team work more efficiently. Employees can spend less time searching for information and more time focusing on tasks that drive your business forward, ultimately boosting productivity and satisfaction across the organization.
Step-by-Step Guide: Adding a Subform in Your CRM
- Login to Vryno CRM:
- Access your Vryno CRM account and log in with your credentials.
- Access your Vryno CRM account and log in with your credentials.
- Access Profile Settings:
- Click on your profile icon or name to access the dropdown menu.
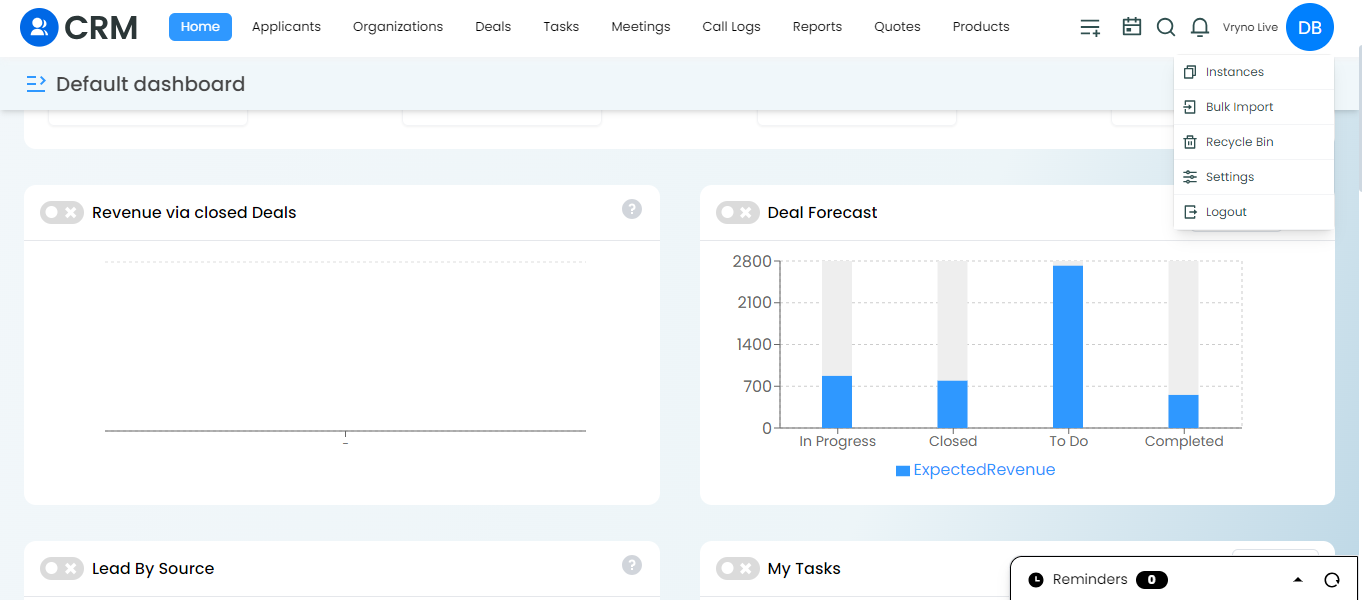
- Select “Settings” from the menu options.
- Click on your profile icon or name to access the dropdown menu.
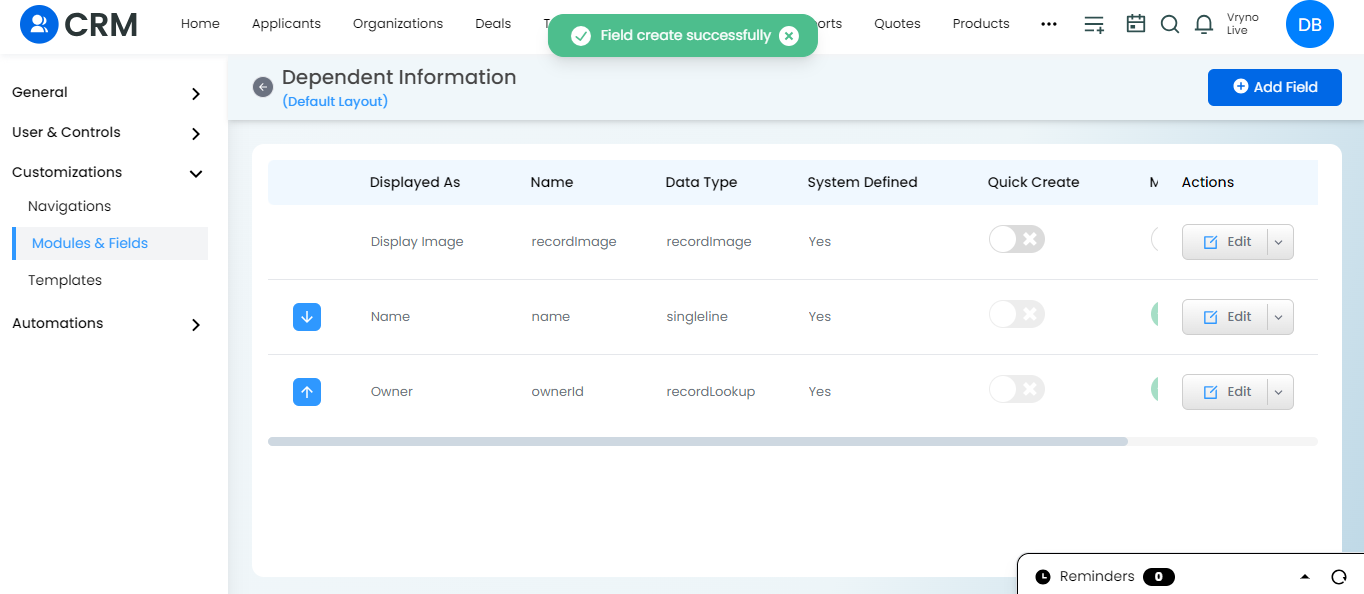
- Customizations Section: Modules and Fields:
- Under the “Customizations” section, navigate to “Modules and Fields.”
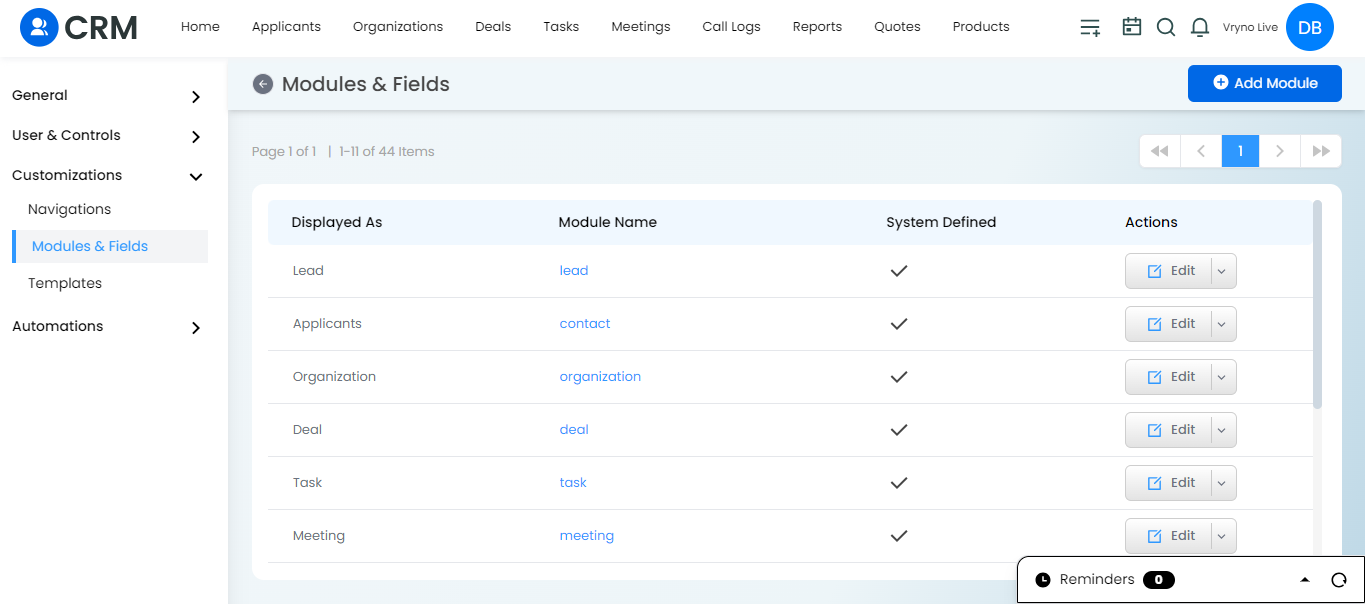
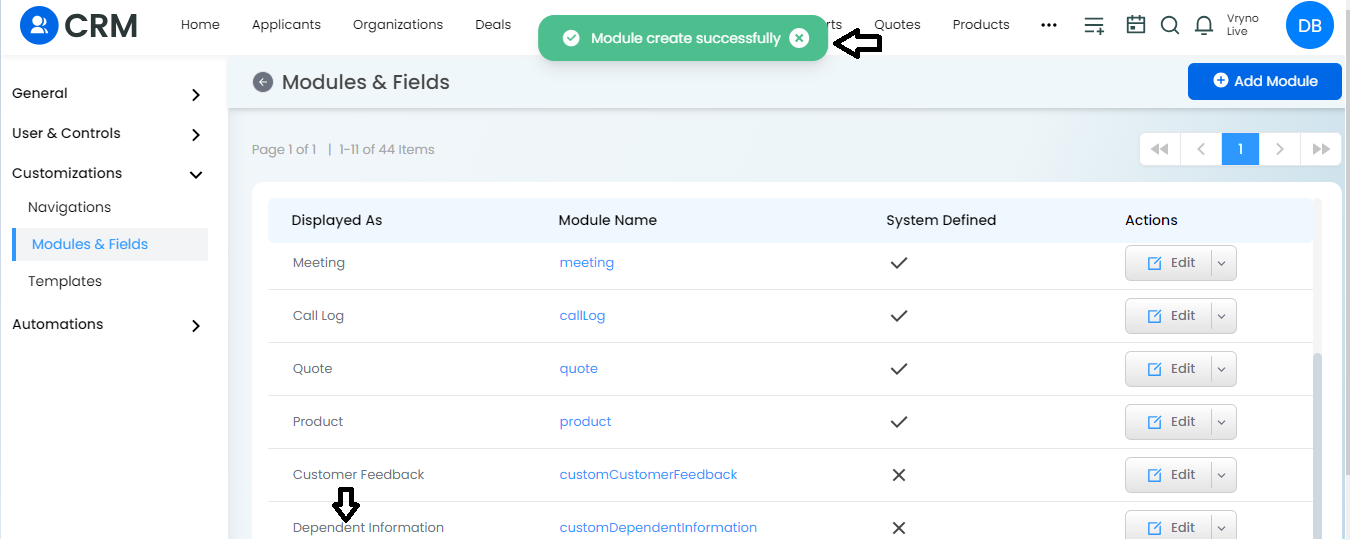
- Click on “+ Add modules” to add a new module for subforms. You can unselect the navigation item while creating the subforms module to hide it from navigation bar.
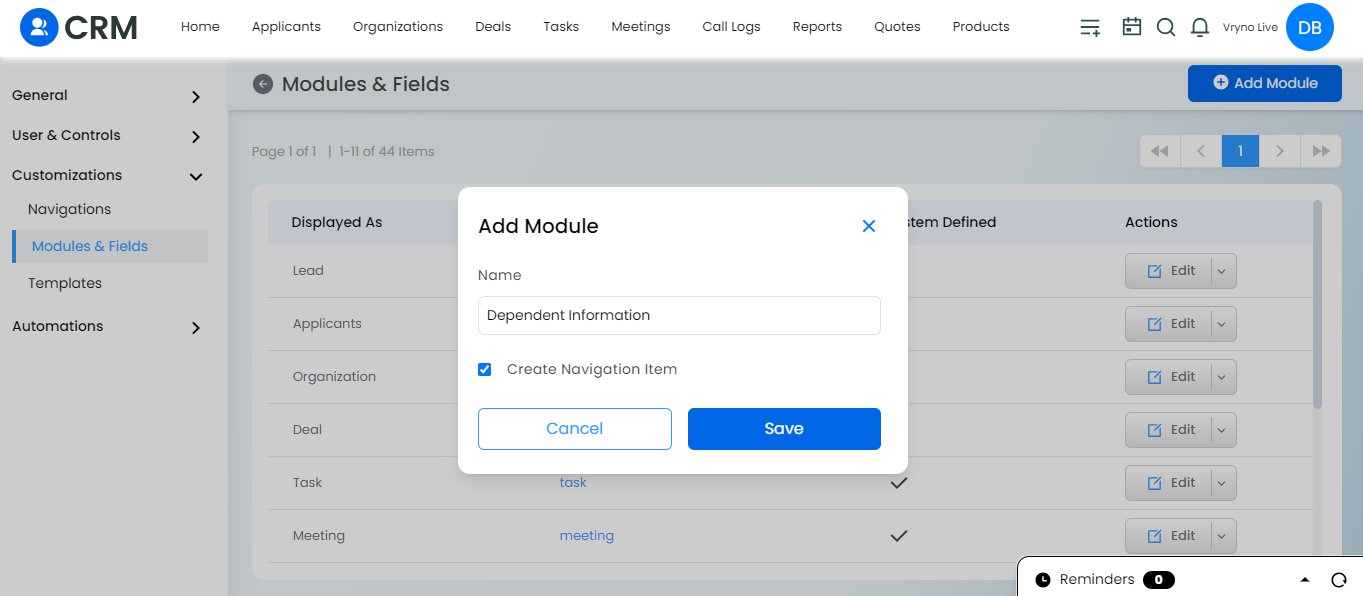
- Provide the necessary details for the new module and click on “Save.”
- Under the “Customizations” section, navigate to “Modules and Fields.”
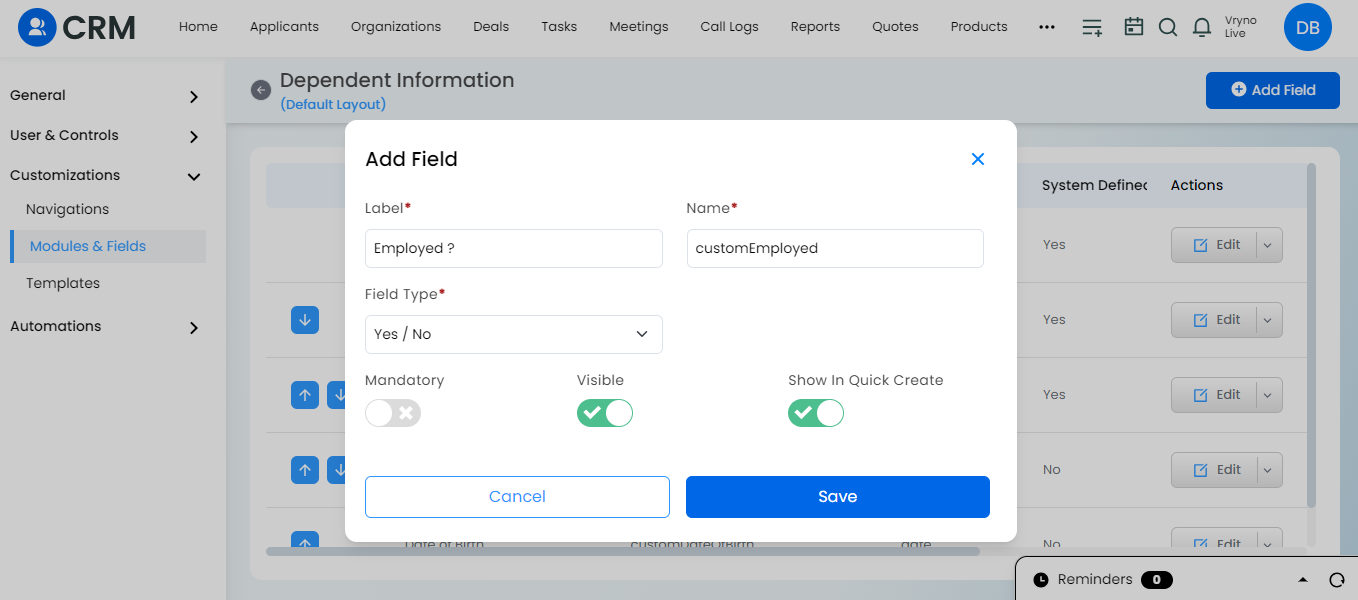
- Creating Fields:
- Open the newly created “subform module” by clicking on its name.
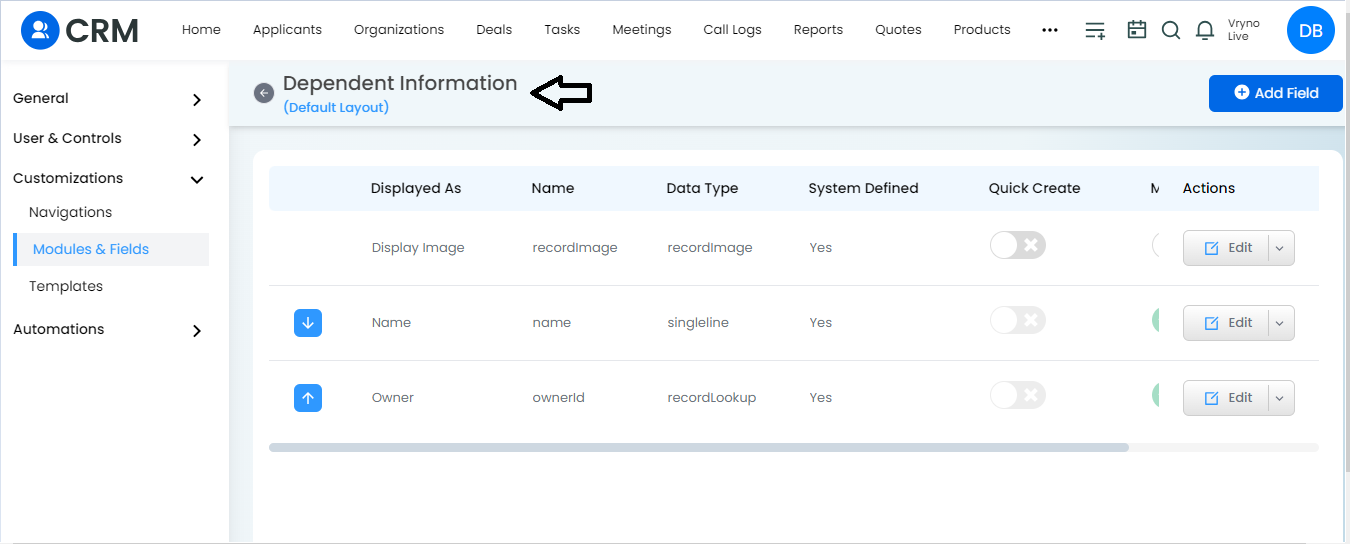
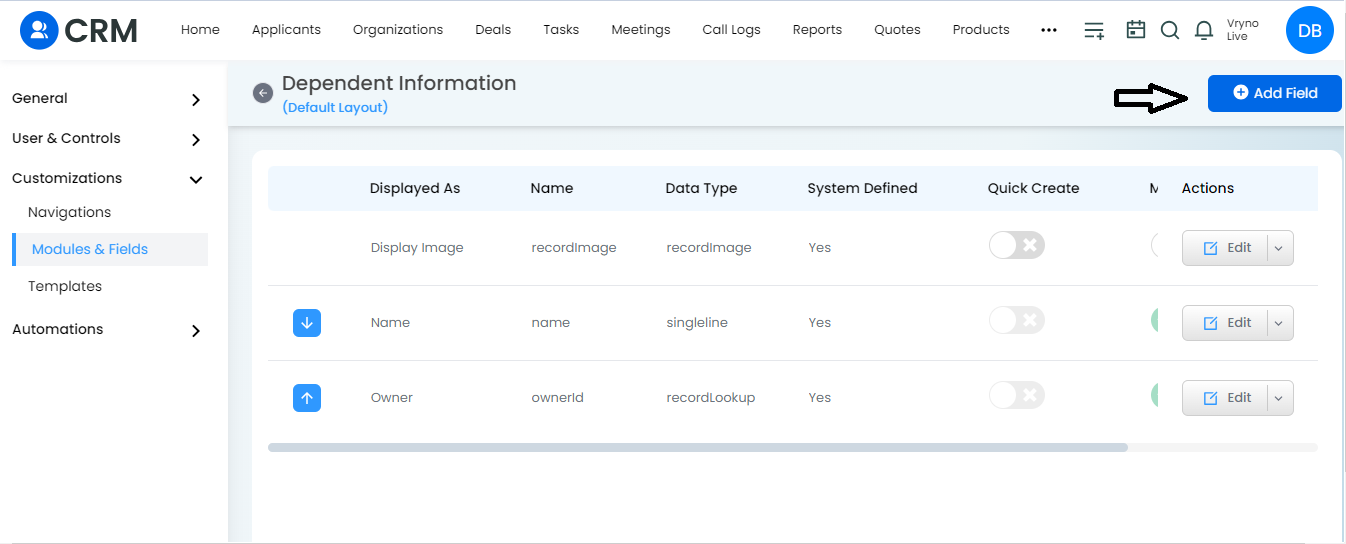
- Create the desired fields under the module by clicking on “+ Add field.”
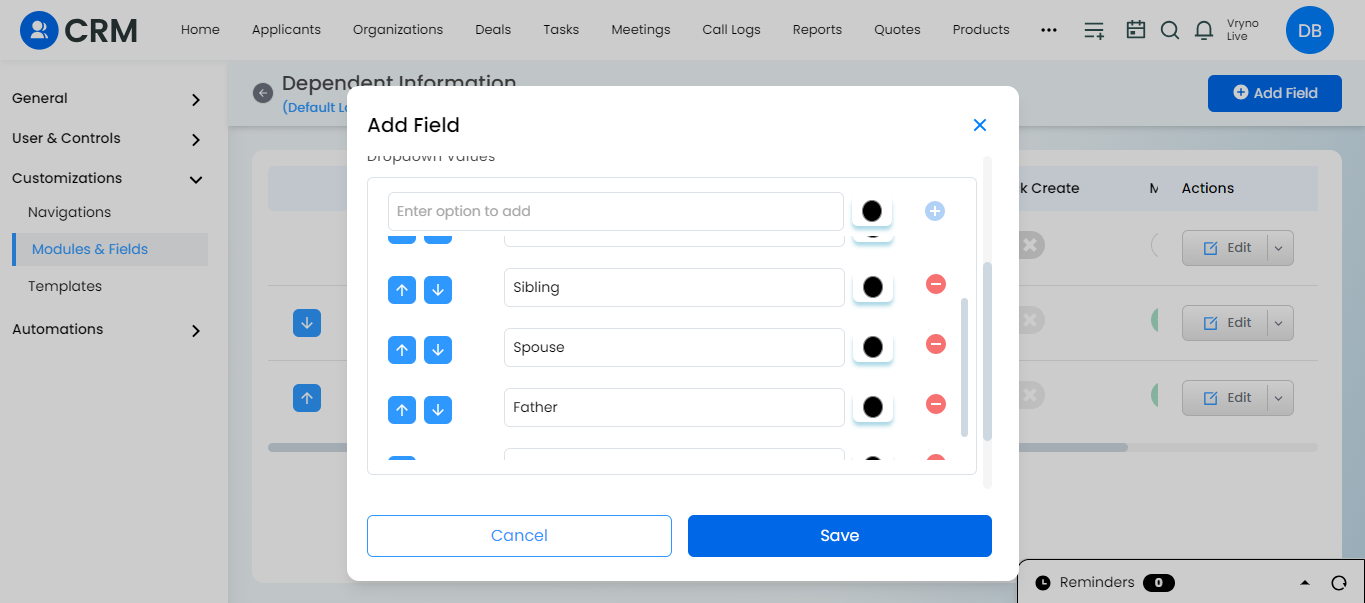
- Specify the details for each field and select the field type as accordingly.

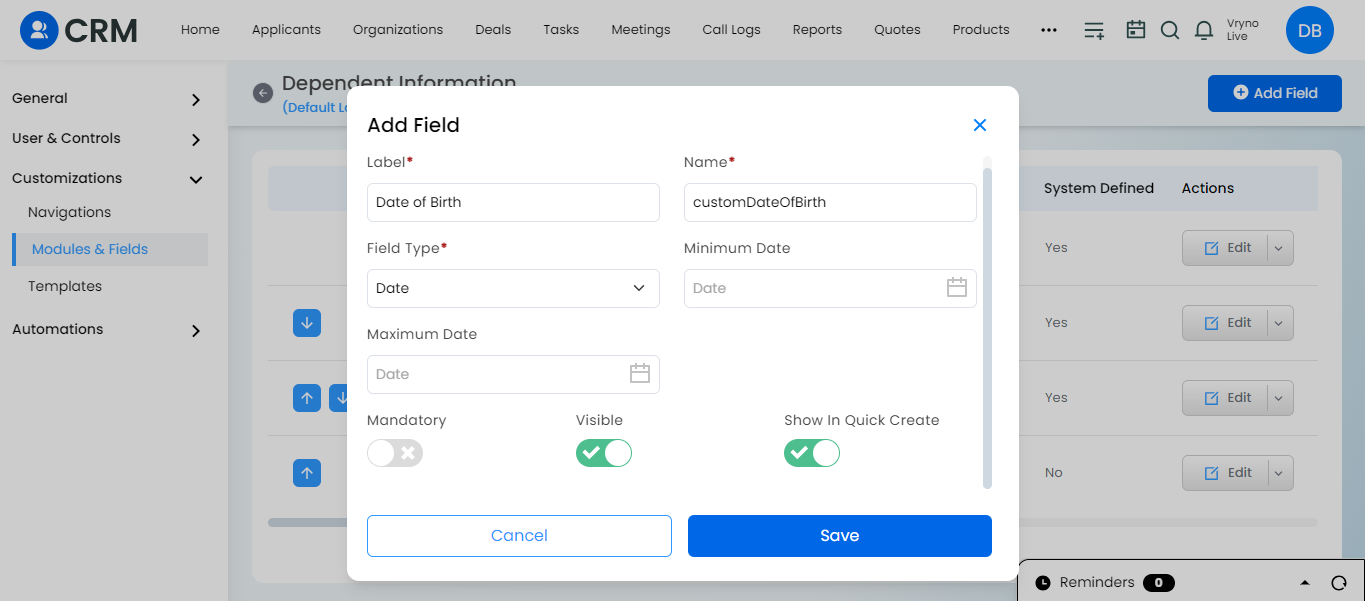
- Fill up the dropdown values with specific colors.
- Ensure the toggle button of “Show in Quick create” is enabled for each field.
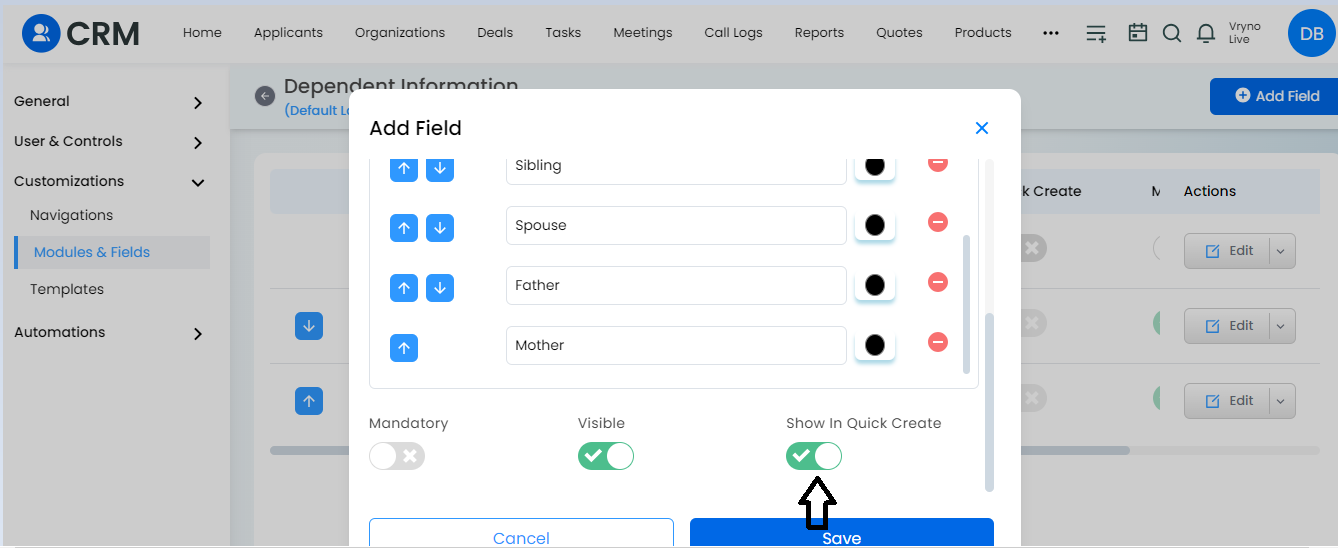
- Click on “Save” to save the changes.
- Open the newly created “subform module” by clicking on its name.
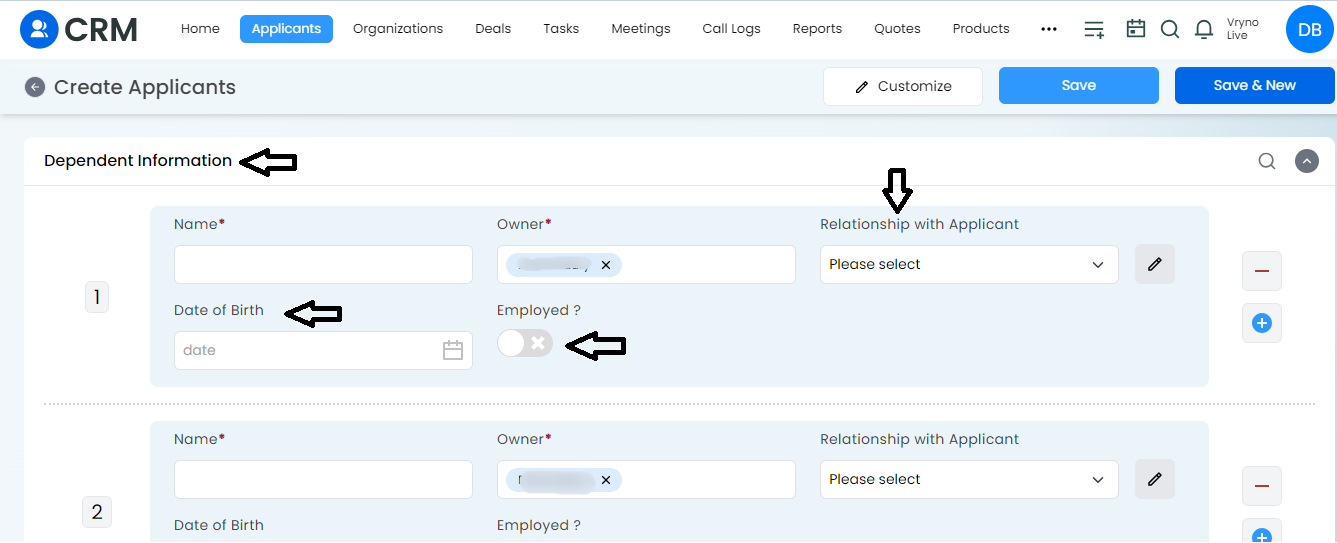
- Adding the Subform in the desired module:For example: I want to add the dependent details subform in the Applicants module.
- Add a field named “Dependent Information” by clicking on “+ Add field.”
- Specify the details for the field and click on “Save.”
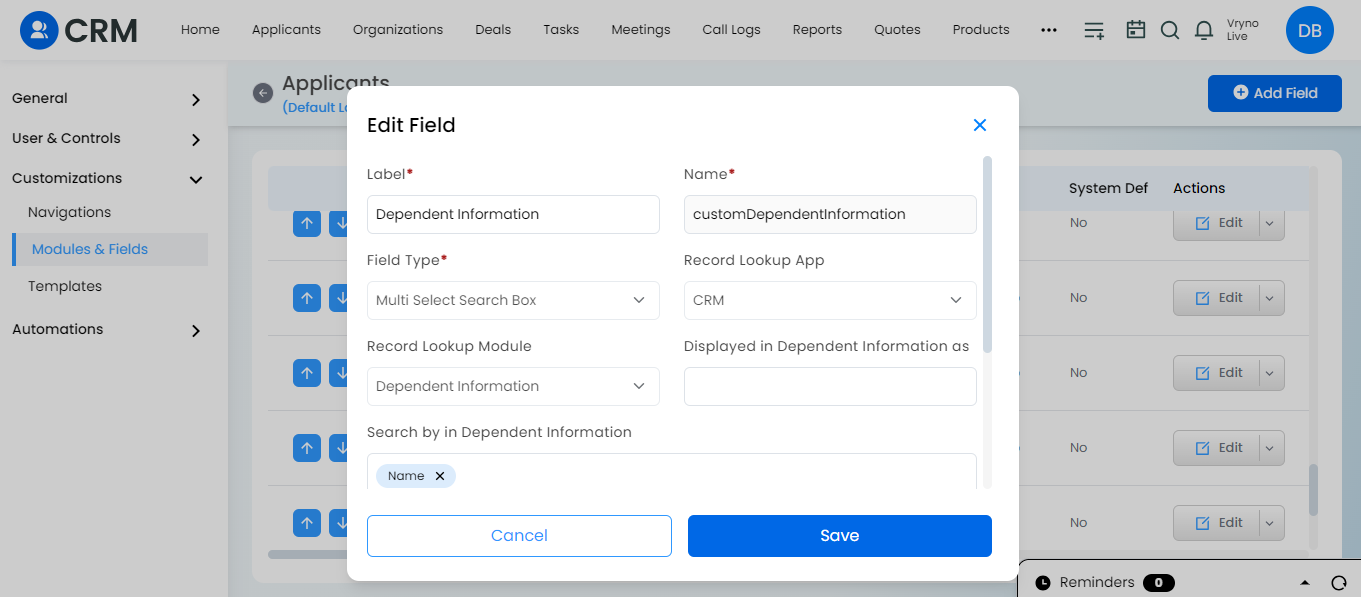
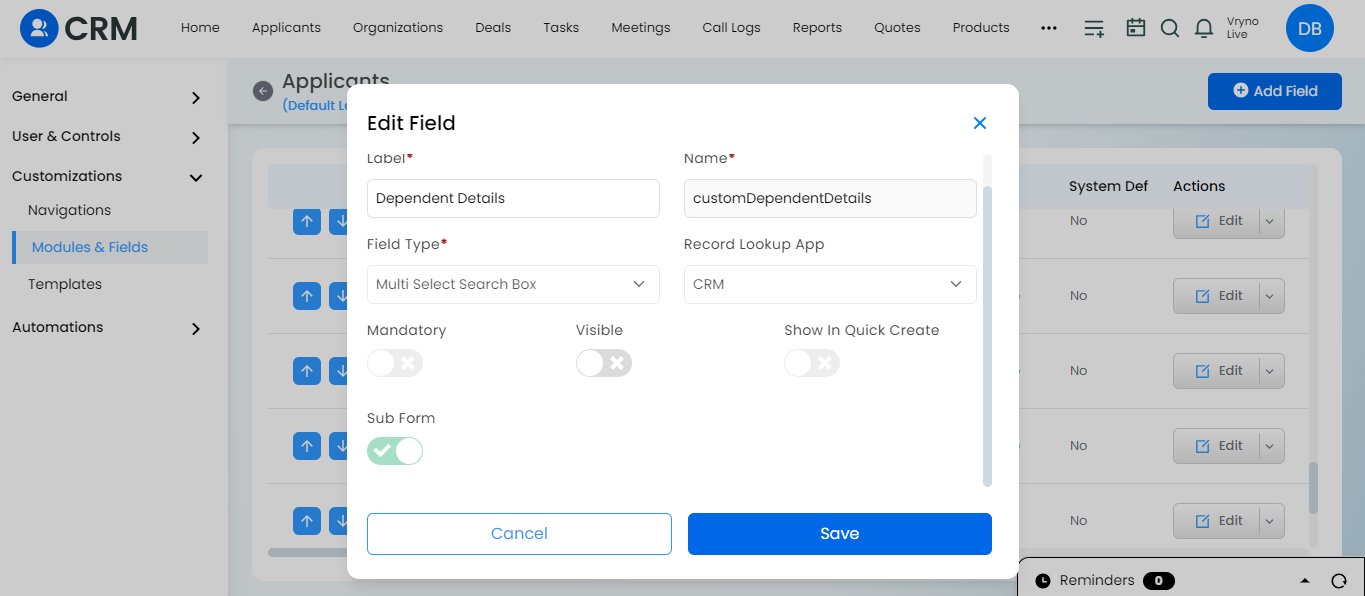
- Make sure the “Subform” toggle button is active.
- Creating entries to a Subform:
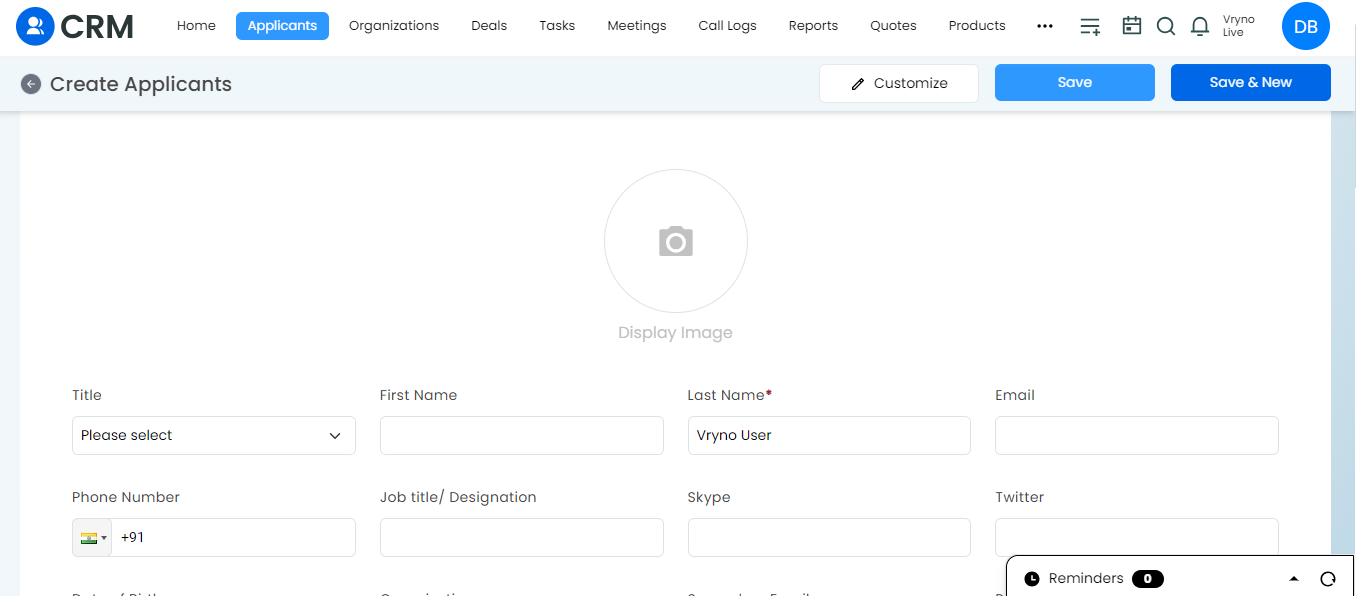
- Go to the module where you added the fields (the module you created In this case, it is Applicants).
- Click on “+ Applicants” to create a new applicant.

- Fill in the necessary details for the applicant.
-